Once you have understood the process of creating a tag, it makes sense to dive in deep and see how tracking is achieved using different approaches.
Page View Tag
A product marketer needs to understand the count of visitors for the product website/blog. This is really critical as it helps understand the visitor trend. It can be to know whether a particular enhancement/feature added in the website/blog is appreciated by the visitor, are the visitors accessing the website on a daily/weekly basis, etc.
Considering ‘Page View’ carried an enormous importance in understanding the likeability of the website/blog, let us see how a Page View can be tracked using a tag.
Step 1 − As we have followed the steps in the previous chapter, let us access the tag section in Google Tag Manager.
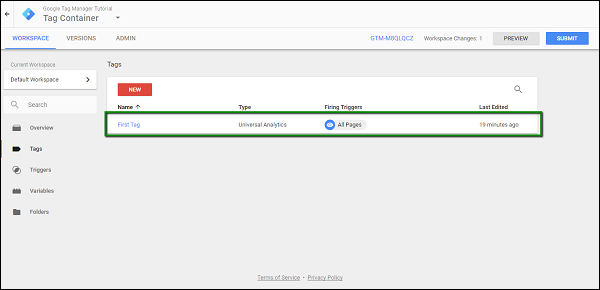
It will show the recently created tag – First Tag.
Step 2 − Click First Tag, it will show the dialog box with the configured triggers, etc.
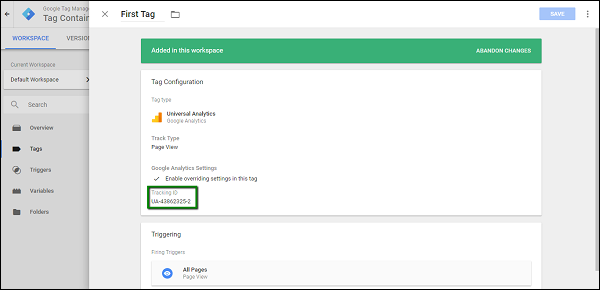
As highlighted in the above screenshot, let us focus our attention towards Tracking ID.
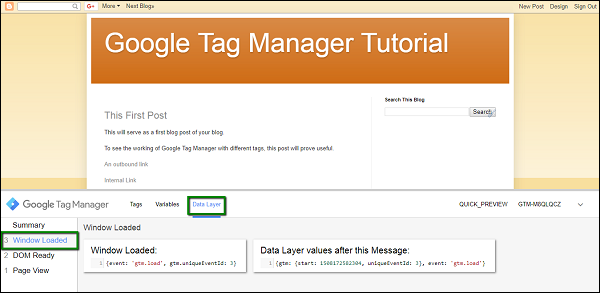
This tracking ID is associated with Google Analytics. When we start the debugging mode, and visit the blog, it will be counted as a single page view.
At this particular moment, Google Analytics will record the page view in its interface.
Step 3 − Debug using Google Tag Manager, and open the Google Analytics dashboard, under Traffic Sources → Overview, you will see the following statistics.
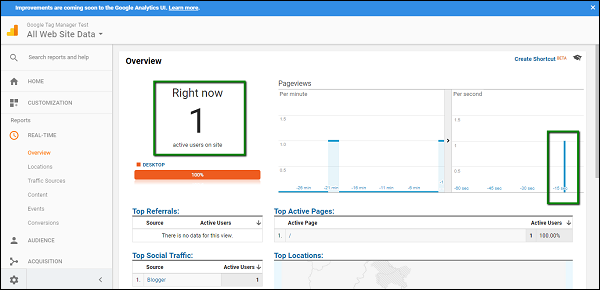
This shows that a page view is recorded and the corresponding page views will be tracked further in Google Analytics.
Link Tags
Many a times there will be certain promotional offers for which a user may be required to leave the blog or website. Along with promotions, these can be some third party surveys that a user may be required to take. These surveys will yield certain statistics, which will be different from the data that is coming in via different tags.
For this purpose, it is useful to have tracking enabled on how many times the link is getting clicked and the user is directed away from the website. Such links are termed as outbound links and these links can be tracked easily using Google Tag Manager.
To demonstrate this, we will be creating a link in our blog.
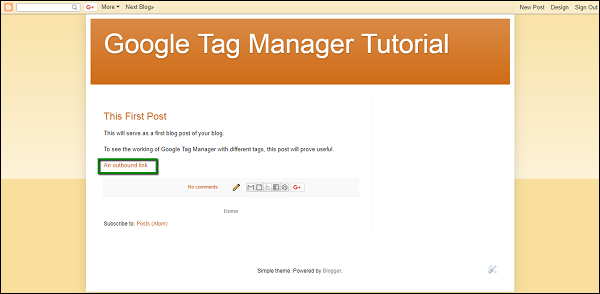
The above screenshot shows a link called – An outbound link. This link will be used for tracking in Google Tag Manager. It redirects to
https://www.google.com
Step 1 − Head to the Google Tag Manager workspace. Click Tags from the left panel. Click NEW button on the page to start creating the outbound link tag.
Let us name the tag as – Outbound Link Tag.
Step 2 − Follow the same process as the initial tag setup for having the Google Analytics code entered in the correct field – Tracking Id.
Step 3 − Select Track Type field as Event. You will be able to see the following options further.
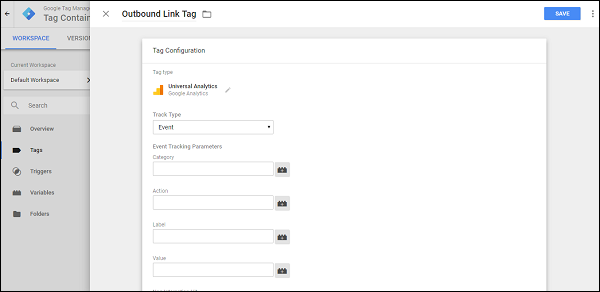
These options are in accordance with Track Type – Event. Notice that these options won’t be available at all under Track Type – Page View. This is because, as we are attaching the Google Analytics code with the Google Tag Manager, to see the details of the event in real time, we need certain parameters.
Step 4 − Fill in the form details as below. Text in bold are the values to be entered in the textboxes.
Step 5 − Next, under the Triggering section, click Choose a trigger to make this tag fire…
Step 6 − Click the blue + icon at the top right corner. It will open the custom trigger section. Provide a name to this trigger as – Click Trigger.
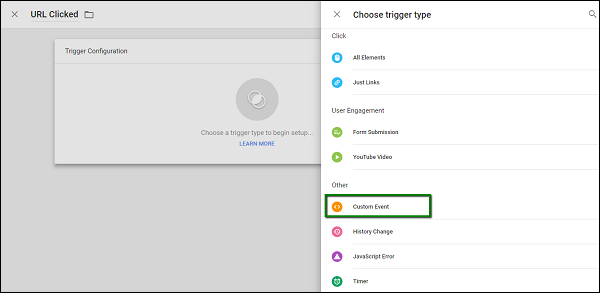
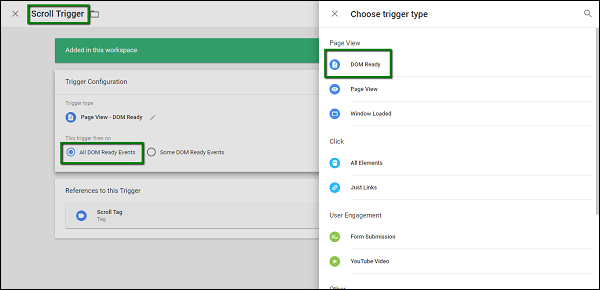
Step 7 − Click Choose a trigger type to begin setup…
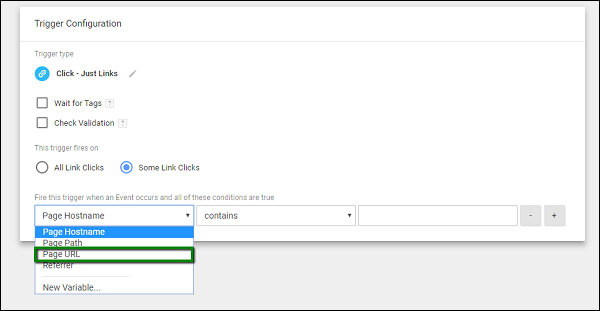
It will show the following trigger types as shown in the following screenshot.

Step 8 − As highlighted in the figure above, click Just Links under Click trigger type. This will show the different options to configure the newly created trigger type.
Now, we need to configure the trigger to fire if the clicked URL has a Page Path as
https://www.google.com. Note that we have configured the link on our blog to redirect to the same URL.
Step 9 − Configure the trigger as provided exactly in the above figure.
We want to configure this trigger to fire on
Some Link Clicks when the Page URL equals
https://www.google.com. Once done, the screen should look like the following.
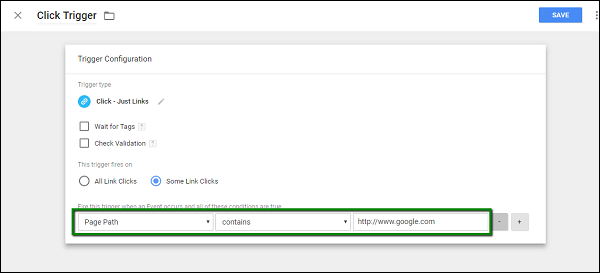
Step 10 − Click the SAVE button to save this newly created trigger. The screen will return back to tag configuration for Outbound Link Tag.
Step 11 − Click SAVE to complete the configuration.
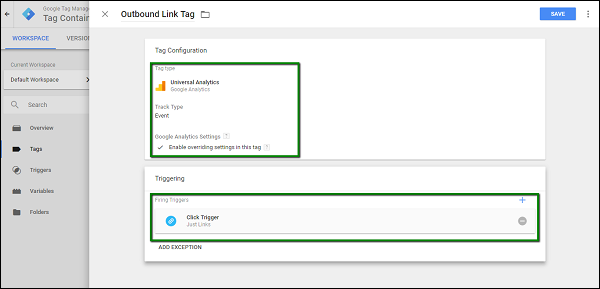
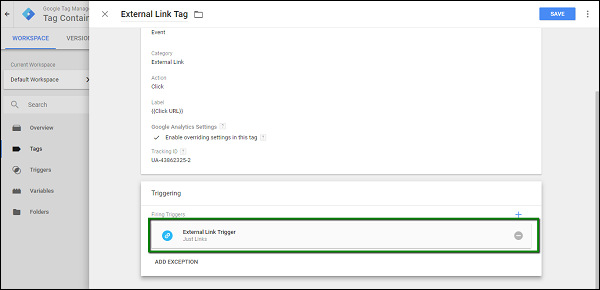
As highlighted in the above figure, a complete tag for outbound link should look like the above.
Now, let us have the tag in action.
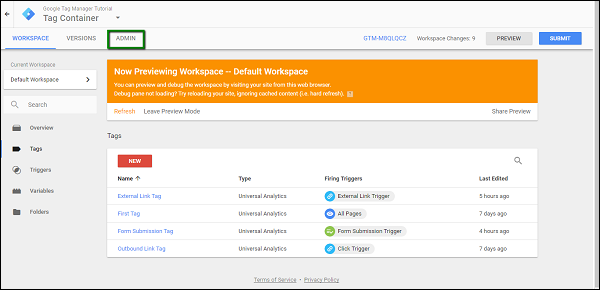
Step 12 − From the workspace, click the PREVIEW button. The debug mode will start.
Step 13 − In your browser, in another tab, open your blog. The debug window will be shown at the bottom of the screen.
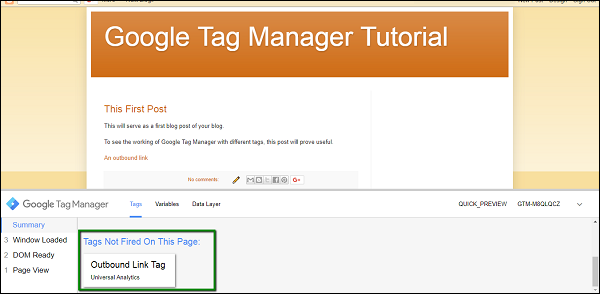
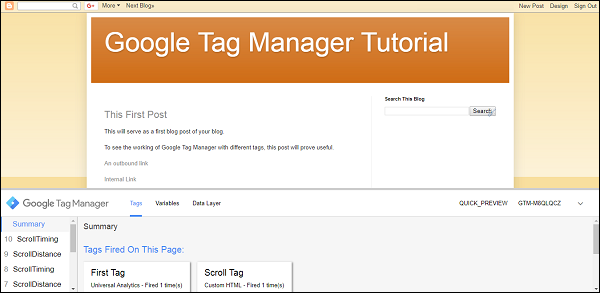
As shown above, since we have not yet clicked the link, the tag still appears under Tags Not Fired On This Page.
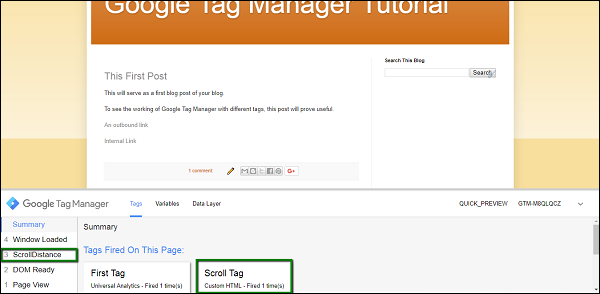
Step 14 − Click the outbound link as created in the previous step, the tag will get fired. You can see it appearing under Tags Fired on This Page.
This concludes the approach for creating a tag for an outbound link to track the links on the blog/website.
Event Tracking
Event tracking stands for any action that is different than a page load. The browser has a specific response to any action that you take on the page. For instance, the action can be as simple as clicking a link or submitting a form to a complex one such as tracking file views and downloads.
With the Google Tag Manager, you can easily track the events generated in the browser. It records the responses from the browser for potential action, thereby getting the particular event track easily.
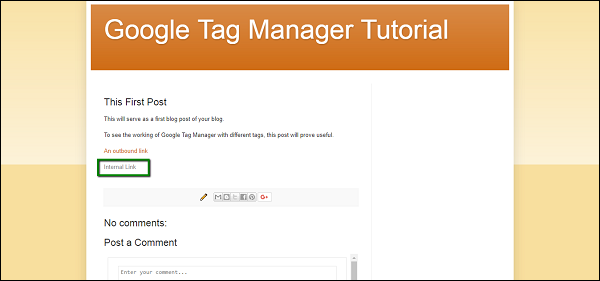
We will use the above example to see event tracking in action. In the previous example we have created a link, which redirects away from our blog. In this example, we will create another link, which will be pointing towards our blog. We are using this example, in order to demonstrate how the links going away from the blog can be tracked seamlessly.
I have created a link called Internal Link in the blog. This link will redirect to the same blog page.
Let us go to Google Tag Manager Dashboard and create a new trigger for the outbound link. We will be using in-built variable Click URL for this. Using Click URL, we are going to detect whether the link being clicked, is redirecting the user outside the blog or not.
To enable in-built variable Click URL, following are the steps.
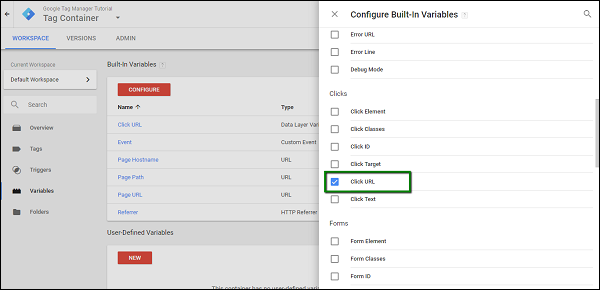
Step 1 − Under Variables section, click the button in red, CONFIGURE. It will show the available built-in variables. There are different built-in variables available, which are – Pages, Utilities, Errors, Clicks, etc.
Step 2 − From the Clicks category, check the box Click URL. This will show the available variables in Click URL immediately. See the following screen for reference.
Now that the variable is configured, we can configure the trigger.
The trigger will be enabled when a user clicks all the URLs, which are redirecting outside the blog. Creating this trigger is fairly simple.
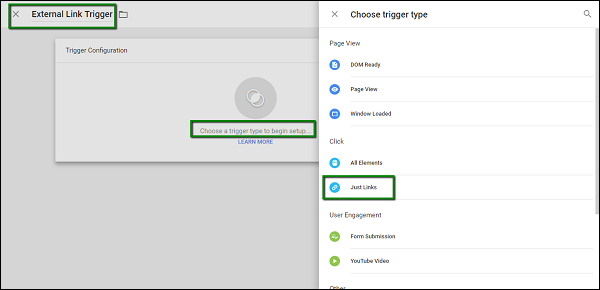
Step 3 − Go to Triggers, click New. Provide a name to the trigger. Let us say, the name is – External Link Trigger.
Step 4 − Under Trigger configuration, click Choose a trigger type to begin setup…
Step 5 − From the available options, under Click, select Just Links. See the following screen for the steps so far.
When Just Links is clicked, you are directed back to the first section, where you will need to provide the URL exception. Following are the steps to do it.
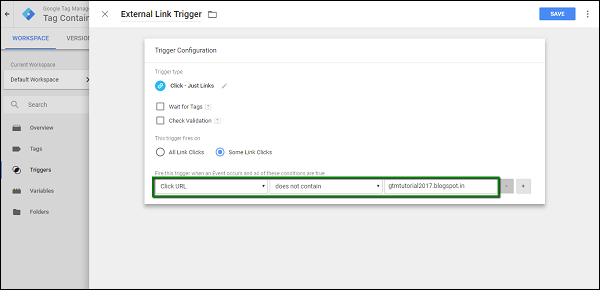
Step 6 − For the option, This trigger fires on, select Some Link Clicks.
Step 7 − Under the conditions, select Click URL, which should be previously selected. Select the value does not contain from the condition options.
Step 8 − In the text box for value, enter a value which is your blog URL. In our case, we will enter gtmtutorial2017.blogspot.in. Once finished, the screen will look similar to the following.
Step 9 − Click the Save button in blue to save your new trigger.
Now it is time to configure our tag, which we will use to track the click event, which will redirect the user outside the blog.
Step 10 − Open the Tags section, click the NEW button. Provide a name to your tag, let us call it – External Link Tag.
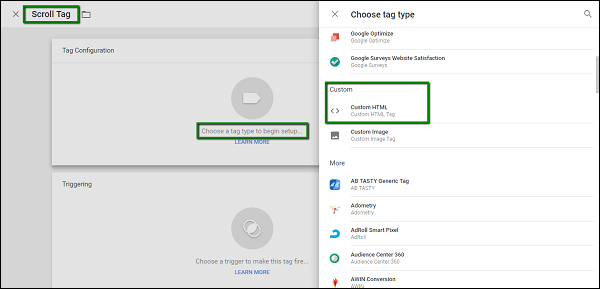
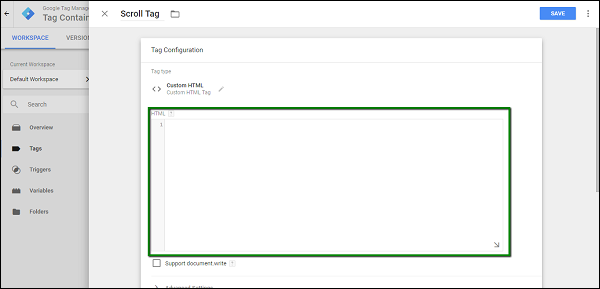
Step 11 − Under Tag Configuration, click Choose a tag type to begin setup… Select tag type as Universal Analytics and enter the following details on the screen.
- Under Track Type, select Event
- For Category – enter External Link
- In Action – enter Click
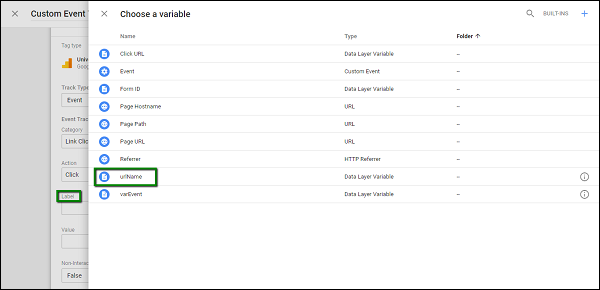
- For label, click the options icon
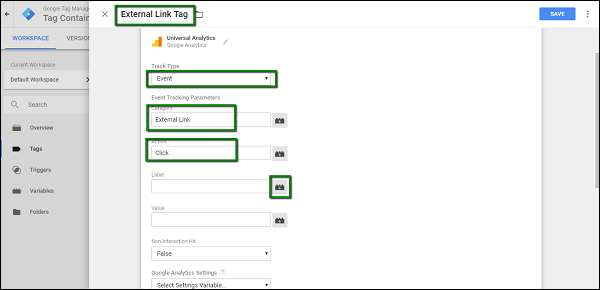
Step 12 − On the side panel displayed, select Click URL.
Step 13 − Once done, check the box Enable overriding settings in this tag. In the Tracking ID text box, enter your Google Analytics Tracking Code.

Step 14 − Scroll down to configure Triggering. We are going to use our newly created trigger.
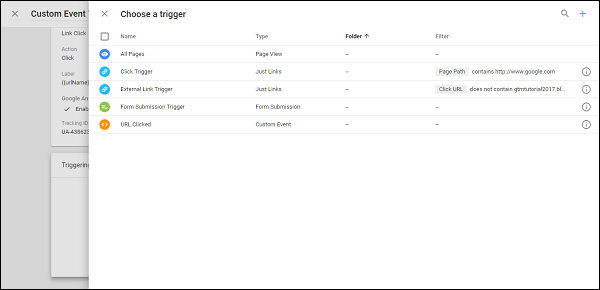
Step 15 − Click Choose a trigger to make this tag fire…It will display the available triggers. Select External Link Trigger, which we have created earlier.
This concludes the configuration of the tag. Click the Save button.
Step 16 − Now, to debug the tag, click the Preview button in grey. It will start the Google Tag Manager in the debug mode.
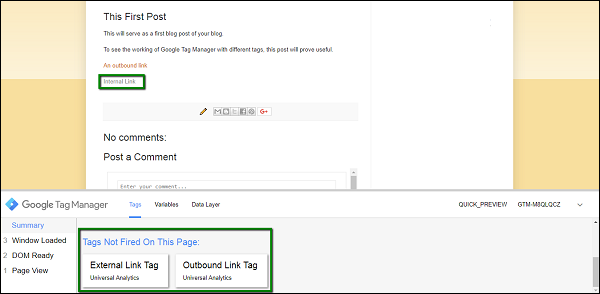
Step 17 − Go back to your blog and refresh the blog for Google Tag Manager Debugger to start. Considering the example above, there are two links being shown in the page. Also, there is the External Link Tag, which is shown under Tags Not Fired On This Page.
Now it is time to test the configuration of the tag. We will use Ctrl + Click in both the scenarios to check whether the tag is fired. Ctrl + Click will have the link opened in the new tab, without refreshing the current page. We need to have the page intact, as we won’t be able to see the tags fired, if the page refreshes.
Step 18 − First, use Ctrl + Click on the Internal Link as highlighted in the above figure. Ideally, the tag should not get fired, as the link is directing the user on the same blog itself.
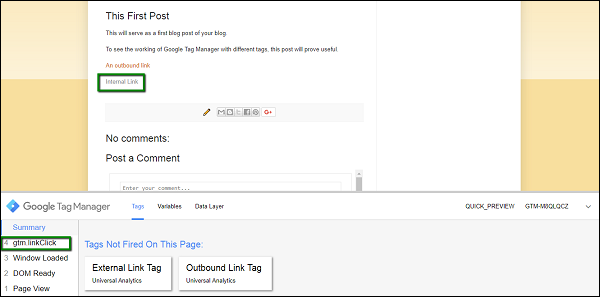
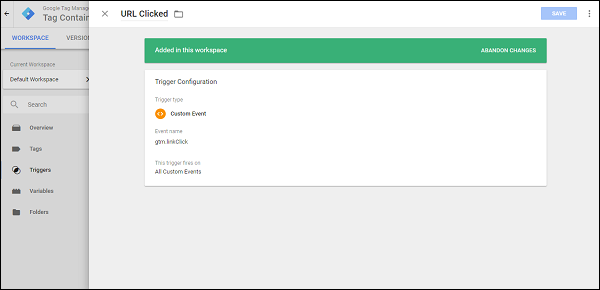
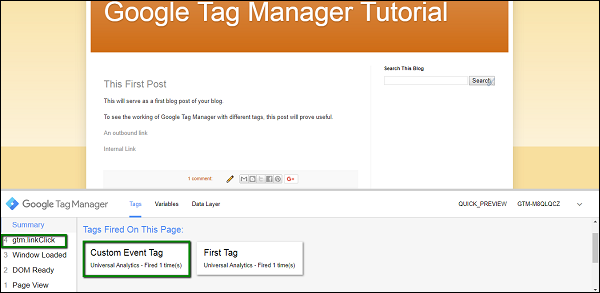
As shown in the above figure, under Summary section in the debugger, you will see another event – gtm.linkClick. This means that GTM has recorded the click event.
But, you won’t see any change in the Tags Fired On This Page section. This is because we have configured the tab for outbound links.
Step 19 − Now Ctrl + Click An outbound link (this was created in the previous section).
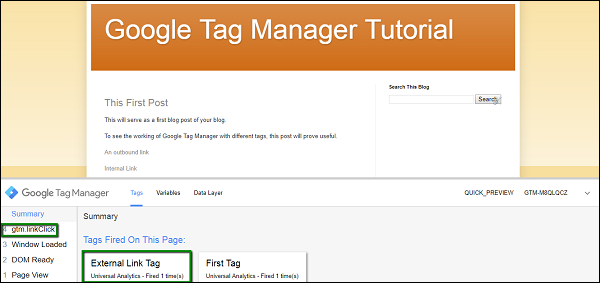
Observe the summary section, it will again get updated for another event – gtm.linkClick.
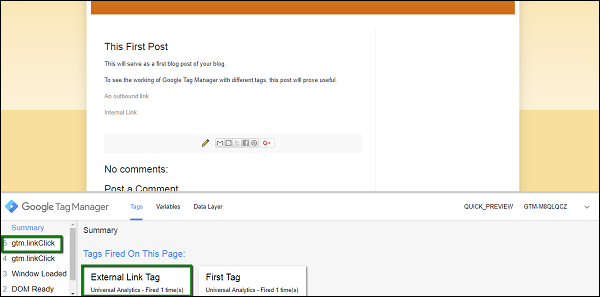
As shown in the above figure, for the next event recorded, there will be a tag fired – External Link Tag. You will be able to see it under Tags Fired On This Page.
In this way, you can employ event tracking with Google Tag Manager and configure tags for critical data that you need from your website/blog.
Form Tracking
More often than not, on any website/blog you will see a form, which will capture certain details from the user. As a product marketer, it becomes tedious to know whether the Form is getting used by the visitors.
It can be a good approach to know how many times a user has filled in information on this form and how many times they came across an error. With Google Tag Manager, you can easily track the form submissions. This section will take you through the process.
For this example, we will have a Contact Us form created on our blog.
Step 1 − For blogger, to have a contact form created, use the Layout option → Add a Gadget. Once you click Add a Gadget, you will see the following screen, where you will find Blog Search gadget. Click the blue plus (+) icon to insert it in the blog.
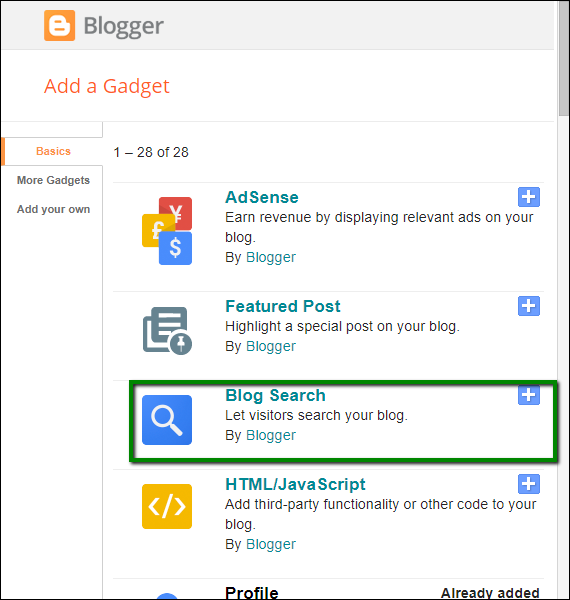
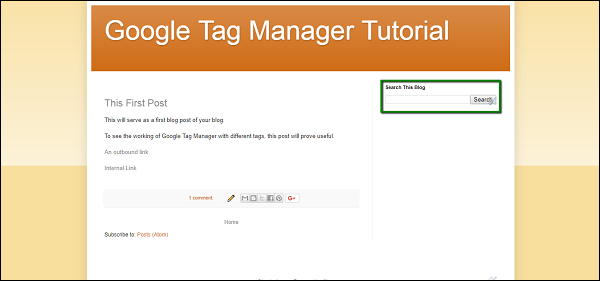
Once done, it will show up on your blog as shown in the following screenshot.
Now, let us configure the related triggers and the tag.
To start with the trigger, we will follow the same steps. We will first add enable a built-in variable called Form ID, then we will create a trigger which will utilize this newly created variable.
Once done, we will use this new trigger to configure a tag for tracking the interactions with the form.
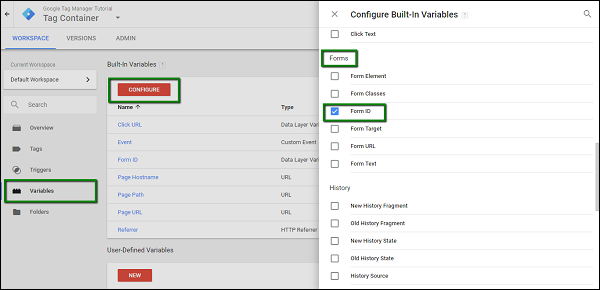
To enable the built-in variable Form ID, following are the steps.
Step 2 − Under Variables section, click the button in red, CONFIGURE. From the Forms category, check the box Form ID. This will show Form ID in the available variables immediately. See the following screen for reference.
Now that the variable is configured, we can configure the trigger.
The trigger will be enabled when the user submits any data in the Contact Us form.
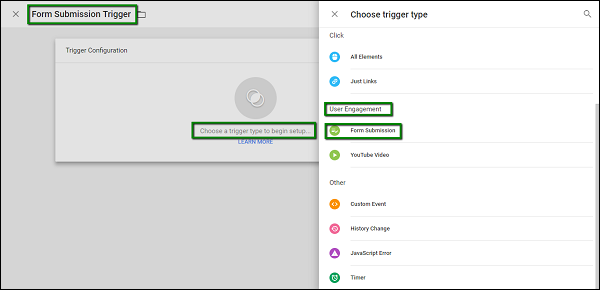
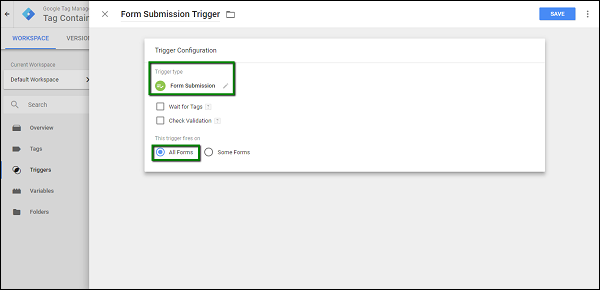
Step 3 − To do so, go to Triggers, click New. Provide a name to the trigger. Let us name it as – Form Submission Trigger.
Step 4 − Under Trigger configuration, click Choose a trigger type to begin setup…
Step 5 − From the available options, under User Engagement, select Form Submission. See the following screen for the steps so far.
When Form Submission is clicked, you are directed back to the first section, where you will need to provide the Form ID.
Step 6 − For the option, This trigger fires on, select All Forms.
Once you are done with the above step, it will enable tracking for all the forms submitted on the blog page. You can also use a specific Form ID, which can be configured when you created your blog.
For configuring a specific Form ID, you may take the support of your website/blog developer to get more details. After completion of these steps, see the following screen for complete reference.
Step 7 − Click the Save button in blue to save your new trigger.
Now it is time to configure our tag, which we will use to track the click event that will redirect the user outside the blog.
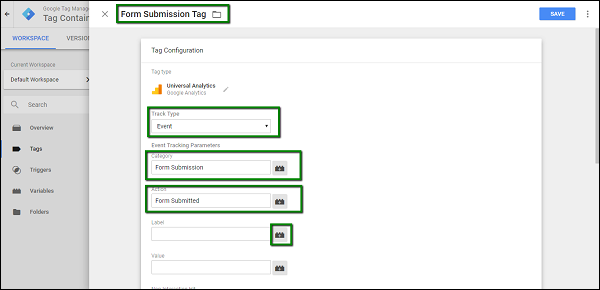
Step 8 − Open the Tags section, click the NEW button. Provide a name to your tag, let us call it – Form Submission Tag.
Step 9 − Under Tag Configuration, click Choose a tag type to begin setup… Select tag type as Universal Analytics and fill the following details −
- Under Track Type, select Event
- For Category – enter Form Submission
- In Action – enter Form Submitted
- For label, click the options icon
Step 10 − On the side panel displayed, select Form ID.
Step 11 − Once done, check select Enable overriding settings in this tag. In Tracking ID text box, enter your Google Analytics Tracking Code.

Scroll down to configure Triggering. We are going to use our newly created trigger.
Step 12 − Click Choose a trigger to make this tag fire…It will display the available triggers. Select Form Submission Trigger, which we have created earlier.
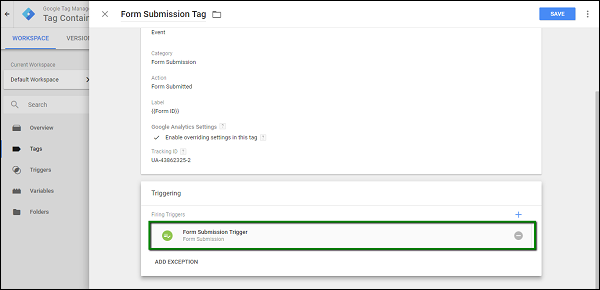
This concludes the configuration of the tag. Click the Save button.
Step 13 − Now, to debug the tag, click the Preview button in grey. It will start the Google Tag Manager in the debug mode.
Step 14 − Go back to your blog and refresh the blog for Google Tag Manager Debugger to start. There will be the Form Submission Tag, which is shown under Tags Not Fired On This Page.
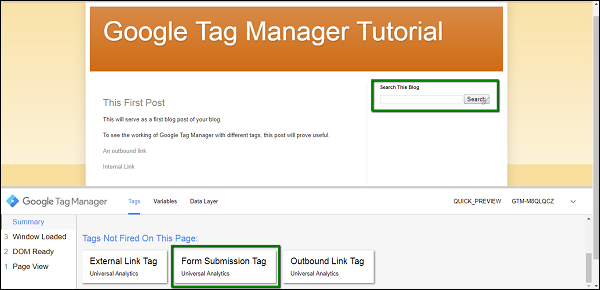
Step 15 − Now interact with the Search This Blog form by entering some values in it. Let us type in First, as our first blog post contains the word First.
Step 16 − Click Search. The new event will be seen under Summary, and the Form Submission Tag will show up under Tags Fired On This Page.
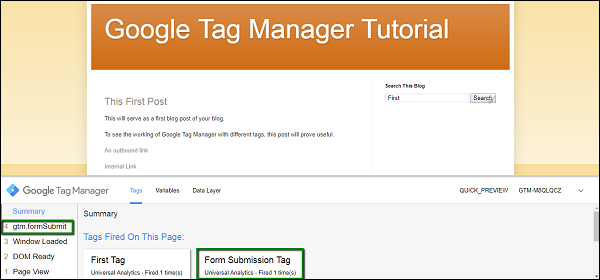
In this way, we can have Form Submission Tags created using Google Tag Manager.